
Night time shooting test this summer

I thought this could come in handy for something.
What usually happens when I go on holiday is that I set myself a whole shedload of somewhat creative tasks, and end up doing none of them. This summer, I set myself just one challenge: To try some night-time long exposure photography.
For those of you who are unaware of exactly what this is, its essentially where you mount your camera somewhere, usually on a tripod and set the exposure to a really long time, we're talking 30 seconds in my instance, but long exposure photography can be minutes and even hours in some instances. This allows you to capture a scene as lit by ambient light, be it the moon, street lamps or any other light source you decide to throw in the mix!
Ok, in case you are interested, there is some essential equipment I took with me:
Camera (duh!) - ok, make sure it has manual mode
Tripod - a good one, plus hang something heavy from the middle of the tripod to secure it in place to stop any movement.
Torch - I used a maglite (plus, it has a great option to remove the hood exposing the candle-esque bulb
Flash (optional) - I used to add extra bursts of light on the image
Gels (or coloured plastic to shoot your flash through) - sweet wrappers also work. Top tip - buy A4 coloured sheets of acetate from a stationers and cut to size
Spare batteries
Wine - only kidding, well, i was in France and it would have been rude not to!
Couple of notes on setting up.
You won't be able to see very much through your viewfinder or be able to accurately focus on anything, so flip off auto-focus and go to manual. Use the dial to approximate the distance that your subject is to be.
Set your ISO as low as possible
Make sure your long-exposure noise-reduction is on (you may need to check manual)
As a starting point, set your exposure to 30seconds, and f20ish.
Set your camera to timer mode (20seconds is fine) - this gives you time to get into position and for any shake that you may have added to the tripod by pressing the shutter (note to self - avoid this by getting a remote trigger!!!)
Then its a couple of shots of trial and error, tweaking your F-stop until you have a decent exposure level in your preview panel.
My results
All the shots below have had minor tweaks in lightroom, nothing drastic, no colouring or overlays. The only main thing I have done is flipped the images around the horizon, so the text is the right way round (writing backwards against a 30 second time limit is impossible ;) ).

Number one - let's start at the beginning .... eeek, watch those legs!

It was only right I did a burningred one.

Should probably be wearing an all-black boiler suit - but my legs look good, yeah?

This didn't work very well - was pretty rushed.

30 seconds isn't a long time to draw outlines and flash around the spot. I need to get my hands on a remote.
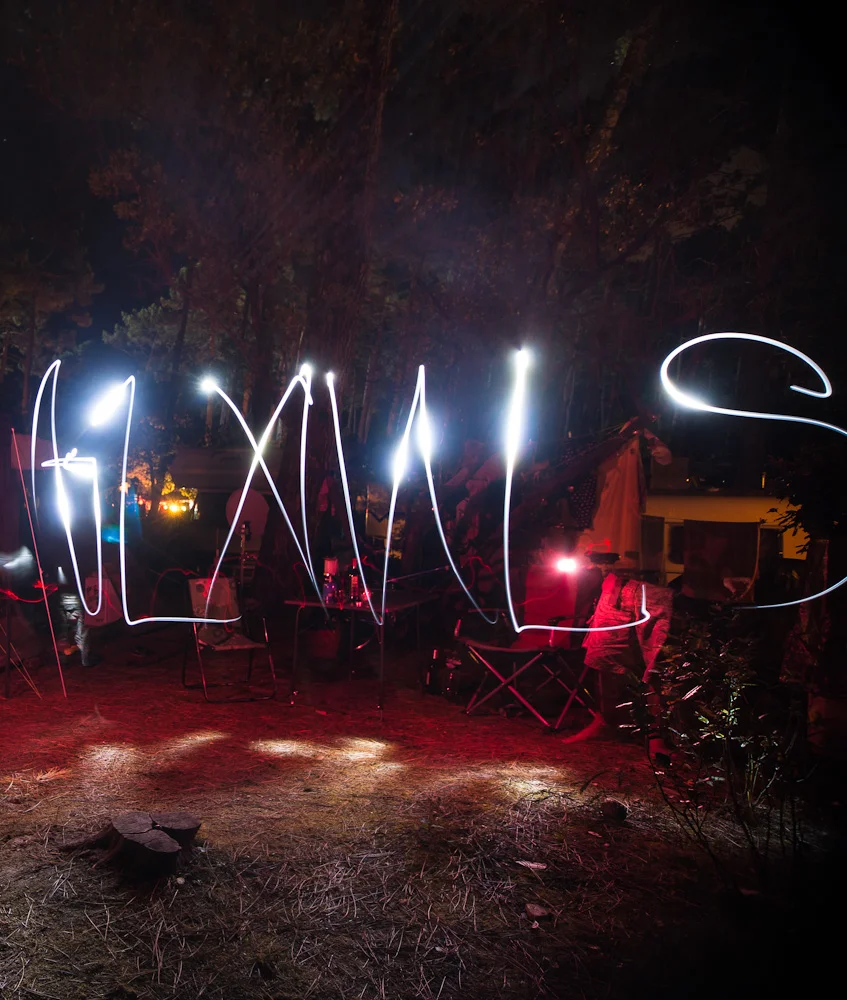
Too many legs!
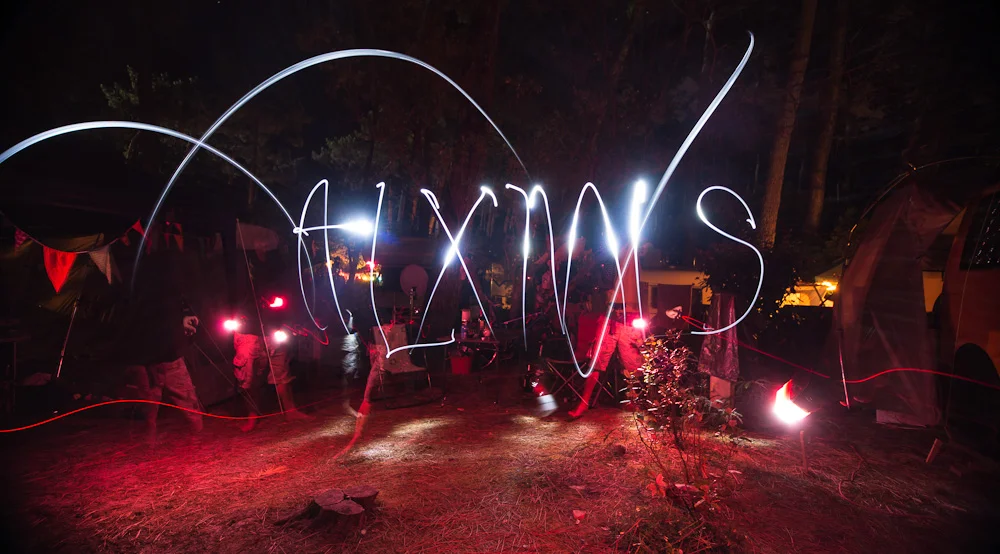
Probably the best drawn one - but I need to keep an eye on where the flash head is pointing to reduce it being seen in the shot.
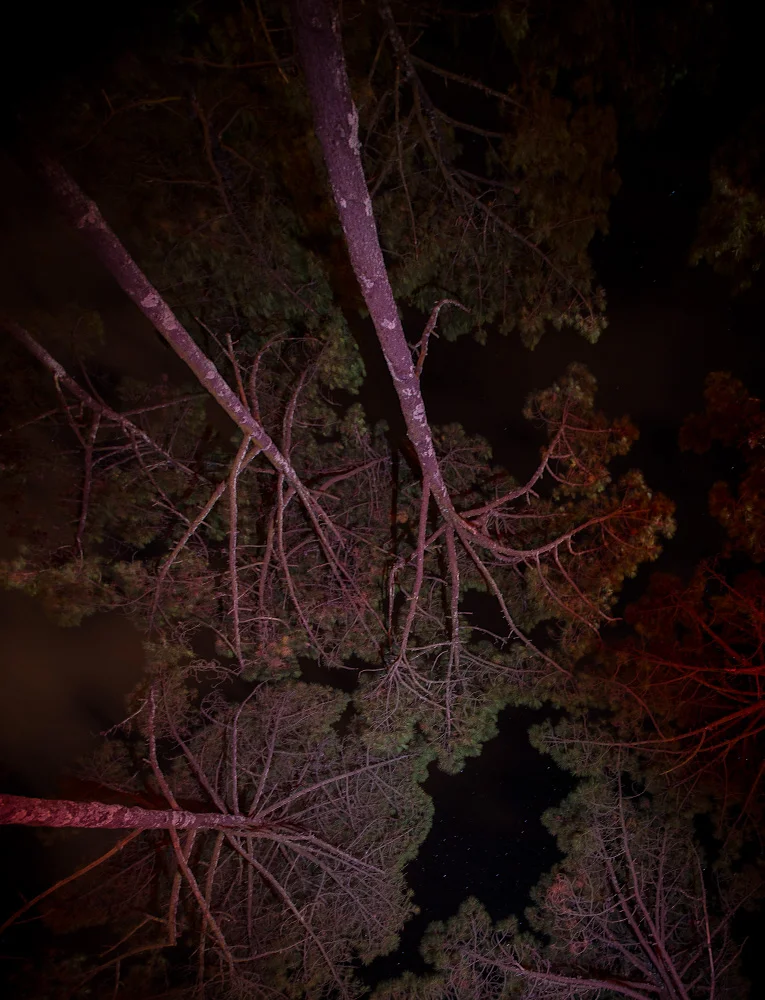
Red and blue gels shooting up the forest camopy.

Shooting straight up to the forest canopy and using solely red gels and flashing multiple times.
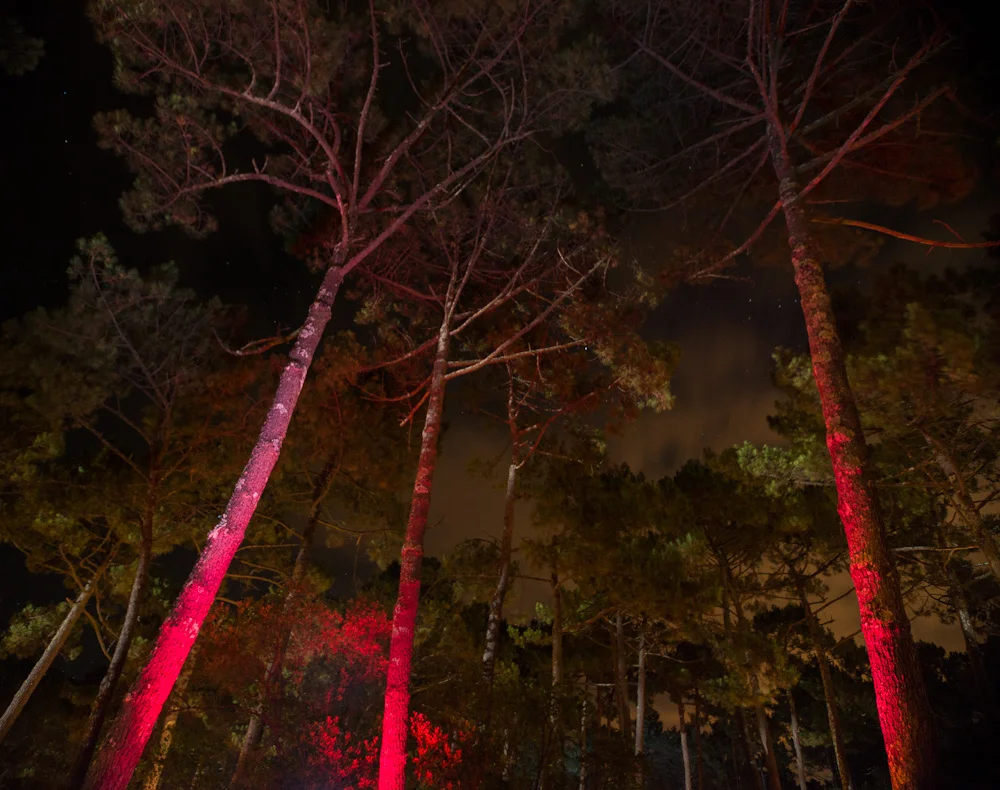
My favorite shot. A nice sense of mystere plus you can see the stars.
In summary
My results weren't perfect - but I learnt a lot. Like I mentioned, these were testers from one night - but I have a shoot planned in a week or two that I wanted to try out a few techniques for and by producing all by myself.
The first thing I learnt is that I need to buy a remote trigger for my camera. This would allow me to open close the shutter at will, rather than being reliant on the maximum exposure time of 30seconds that my camera comes with as default.
Secondly, think about your background. Visual clutter is a pain in the proverbial.
Thirdly, writing in capitals is harder than you think (you have to constantly switch torch on and off, otherwise the light trails render it illegible!)
Fourthly, wear black, all black and gloves.
Have fun!